DIY Twisted Yarn Ribbon

ribbon

Yep. Another DIY. I am having fun with this one. It is so easy and really pretty!

I had never really thought of yarn as ribbon but it is so versatile I will probably be using it from now on.

You will need:

  • Yarn
  • Scissors

Directions

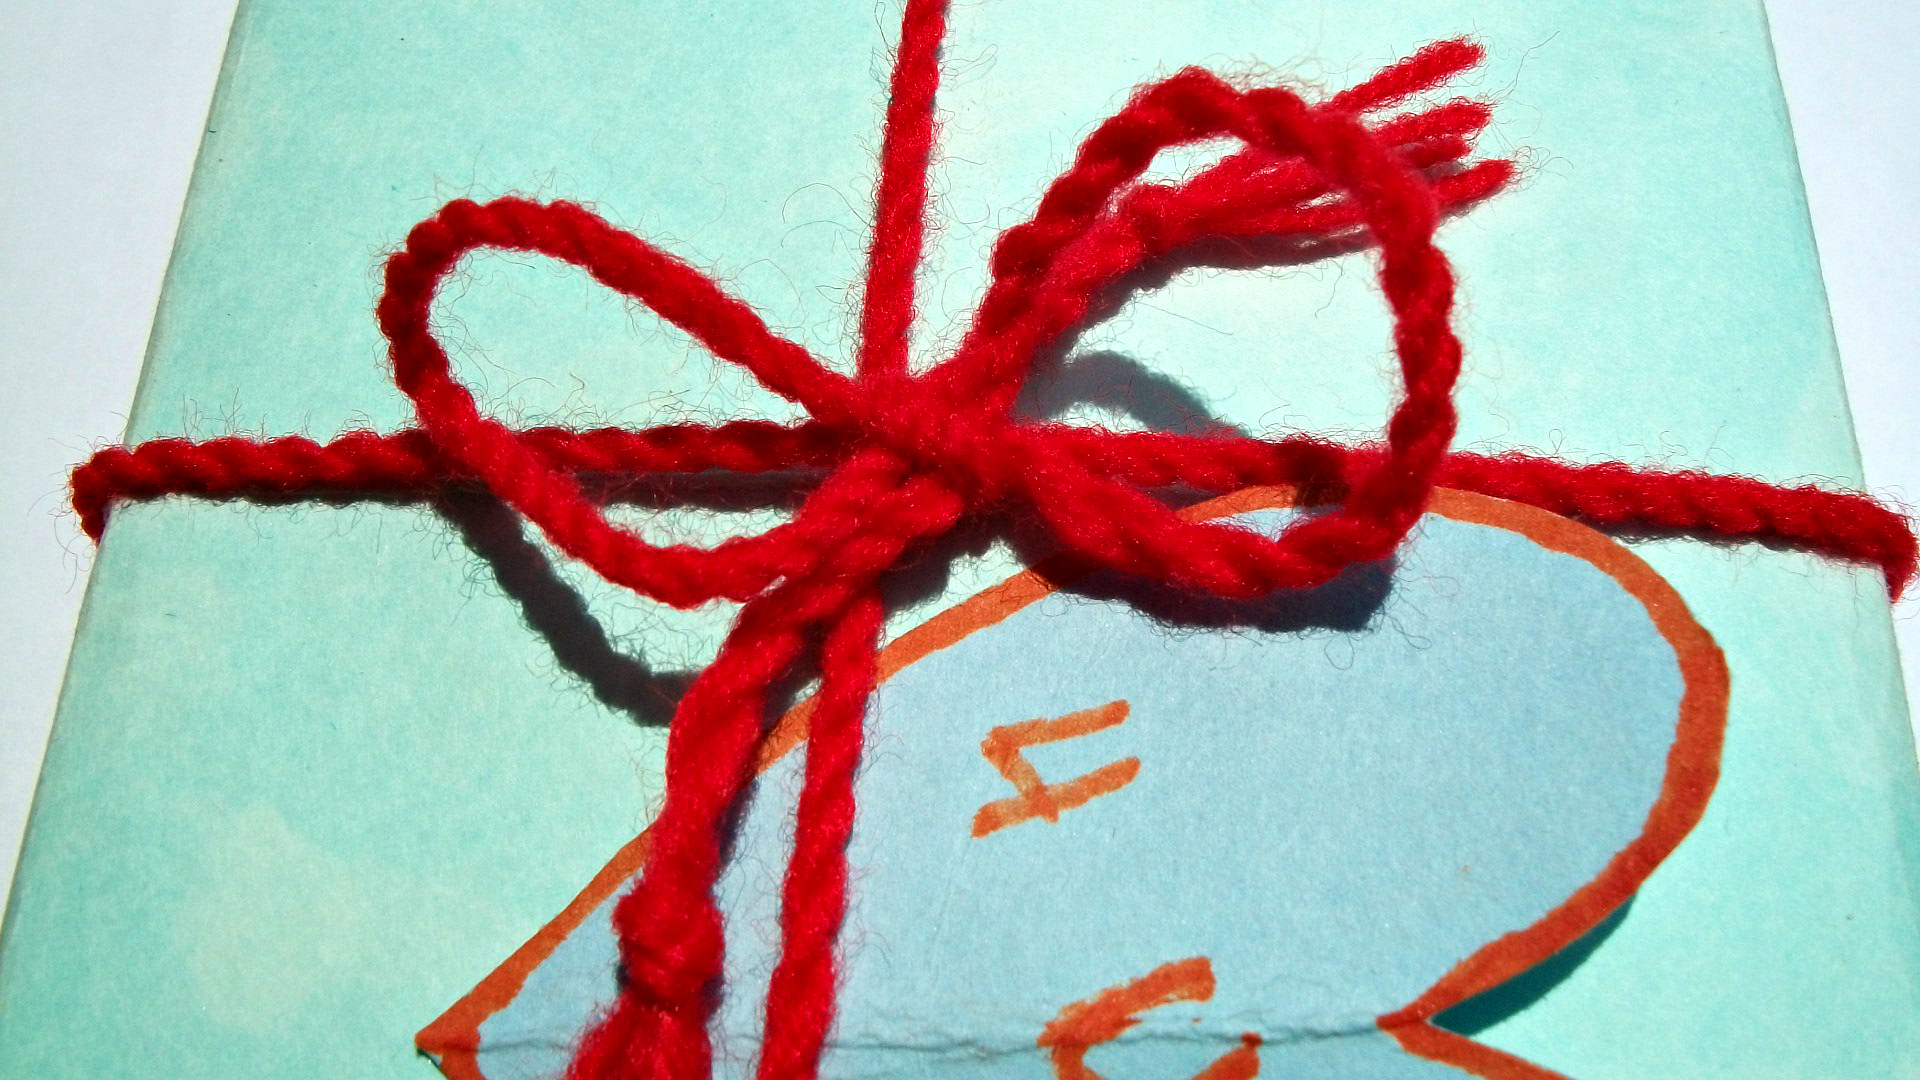
  • Cut four strands of yarn  according to your length. I used 3ft
  • Tie a knot at the beginning of the strands
  • Start twisting until you reach the end of the strands
  • Tie another knot at the end of the strands
  • Wrap your gift.

NOTE: The length will depend on the size of your gift box. The size may vary too.


See it is so easy. Have fun

🙂

Sophie


DIY Paper Chandelier

GEDSC DIGITAL CAMERA

I was supposed to share this earlier this year but I don’t know what happened. Please don’t ask. This paper chandelier completes the transformation of our room that I talked about at the beginning of this blog here. I will share more of what we did later but I wanted to share this tutorial. It is as easy as 123…ok maybe not ha!

What you will need:


  • 4-6 sheets of white A4 paper
  • 1-3 sheets of colored A4 paper ( I used brown)
  • A round object(think jar/bottle cover)
  • A pair of scissors
  • white sewing thread
  • Needle
  • Square wooden frame
  • Pencil
  • Tape
  • Yarn( preferably white though I used orange)


Directions

  1. Using a bottle/jar cover and pencil, trace circles of the white paper
  2. Do the same on the colored paper
  3. Cut out all the circles using the scissors
  4. Using a needle and thread, make two straight holes in the paper circles. One at each end of the circle.
  5. Continue adding the circles on the thread until they are seven circles on each thread.
  6. Tie the end of the thread so the circles will not fall out
  7. Make 16 strings of  7 circles
  8. Using tape, tape the first circle of every string on the wooden square frame
  9. Make sure each side has four strings
  10. Using the yarn, secure the chandelier on the light fixture

PS: The frame has to be light weight to prevent any hazards

And there you have it!

DSC00017

The great thing about this chandelier is that it is so versatile. It works as a chandelier by night and a mobile by day.

Have a great weekend and  happy DIYing.

🙂

Sophie

DIY Polka Dot wall

Image

This is the time of the year when color is everywhere and I am so in the mood of color right now. This wall art was done after much desperation with what to do with our plain room wall. We(me and my sisters) had to come up with a way of making  it colorful without going against the rules. So for months we racked our brains until one day I discovered we could just cut circles of different shapes  out of cardboard and use water paint to paint them different popping colors and paste them on the wall. That is how easy and simple it is. The room is painted a cream water color so the colored circles blended perfectly. Since it worked perfectly for us, I couldn’t help but share a tutorial.

Materials:

  • Cardboard box (You might need more than one depending on how dotted you want your room to be. We dotted one side of the wall.)
  • Mold (you can use different sized caps of bottles and jars)
  • Pencil
  • Scissor
  • Water paint
  • Paintbrush
  • Tape

Steps:

  1. First of all make sure you have all the materials.
  2. Using a pencil and mold, draw circles in different sizes.
  3. After drawing enough circles start cutting out the circles while dividing and  stacking them according to their sizes.
  4. get out your paint and brush  and paint the stacks different colors. For example paint  the 2in. diameter circles a shade of peach, the 4in. diameter circles a shade of magenta and on and on.
  5. Let them dry at room temperature. This may take about thirty minutes.
  6. After they have completely dried, tape them at the back  and paste them on the wall beginning with the largest circles until the smallest.

It was a fun project an it satisfied my craving for painting. Let me know if you ever try it. Hope you have fun

🙂

Sophie


Â