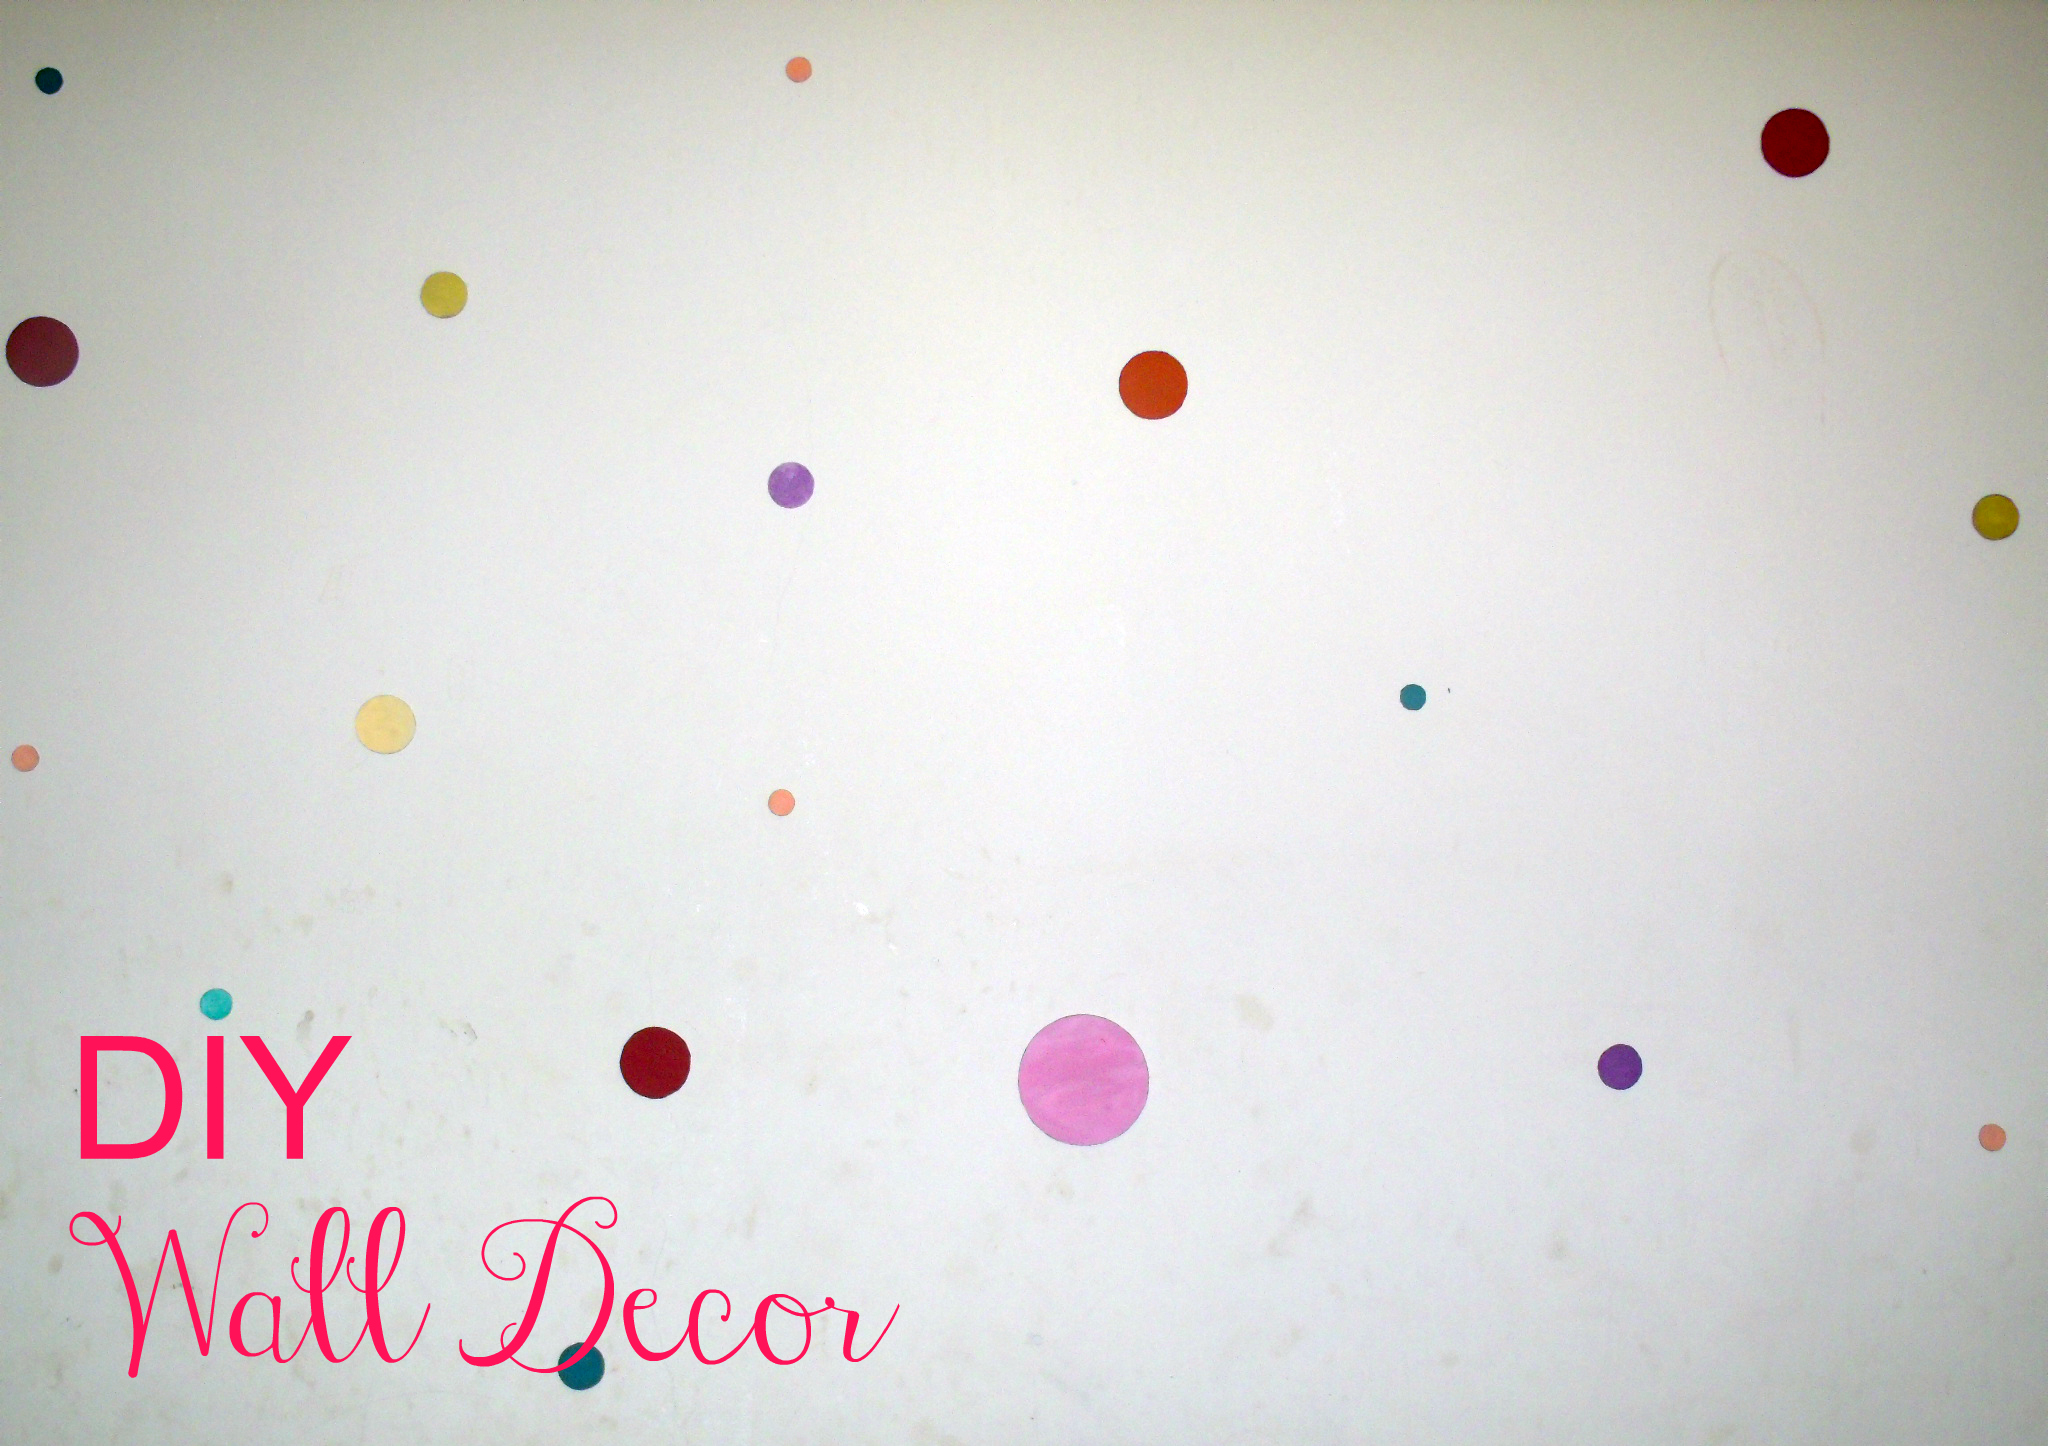
This is the time of the year when color is everywhere and I am so in the mood of color right now. This wall art was done after much desperation with what to do with our plain room wall. We(me and my sisters) had to come up with a way of making it colorful without going against the rules. So for months we racked our brains until one day I discovered we could just cut circles of different shapes out of cardboard and use water paint to paint them different popping colors and paste them on the wall. That is how easy and simple it is. The room is painted a cream water color so the colored circles blended perfectly. Since it worked perfectly for us, I couldn’t help but share a tutorial.
Materials:
- Cardboard box (You might need more than one depending on how dotted you want your room to be. We dotted one side of the wall.)
- Mold (you can use different sized caps of bottles and jars)
- Pencil
- Scissor
- Water paint
- Paintbrush
- Tape
Steps:
- First of all make sure you have all the materials.
- Using a pencil and mold, draw circles in different sizes.
- After drawing enough circles start cutting out the circles while dividing and stacking them according to their sizes.
- get out your paint and brush and paint the stacks different colors. For example paint the 2in. diameter circles a shade of peach, the 4in. diameter circles a shade of magenta and on and on.
- Let them dry at room temperature. This may take about thirty minutes.
- After they have completely dried, tape them at the back and paste them on the wall beginning with the largest circles until the smallest.
It was a fun project an it satisfied my craving for painting. Let me know if you ever try it. Hope you have fun
🙂
Sophie

One thought on “DIY Polka Dot wall”