Stir-Fry Green Beans with Roast Peanuts

October is upon us people and with everything around green, it’s not hard to find green beans at the market stalls. Beans are a common side dish but eating them in their premature stage is not usual in Uganda. In fact, after much thought, I have come to realize that I’ve not seen a fellow Ugandan buying green beans from the market ( but maybe it is me only…hmm). The day brought it’s self when there were green beans, roasted peanuts, purple onions, carrots, garlic, and a plentiful supply of spring onions from the garden. So we were like, why not fusion?! Drawing inspiration from African cuisine and East Asian cuisine we developed the stir-fry green beans with roasted peanuts recipe; really easy to pull together. The awesomeness of still crisp green beans and slightly sweet carrot, followed by the roasted peanut fried in garlic, and occasionally biting into a sliced, nearly tender, purple onion or a long-cut spring onion… Perfected with white rice.

What you’ll need:

DSC_0033 - Copy Method

First off, on high heat, pour three tablespoons (or an equivalent) of cooking oil in a pan and add salt. After the oil has heated up, add the garlic and let it brown. Next add the crushed peanuts, stirring briskly. Next add the green beans and keep stirring. After a minute, add the spring onions. Next add the carrots and keep stirring for 5 minutes to make sure everything cooks evenly. After add the onions and  sprinkle some sugar then continue stirring for two more minutes. Remove from fire and let cool. Serve with rice (or just eat them like that ha! I can do that!).

So what new thing are you trying this month? Let me know in the comments below.

🙂

Sophie

Firinda Soup

Firinda - A Kitchen in Uganda-5

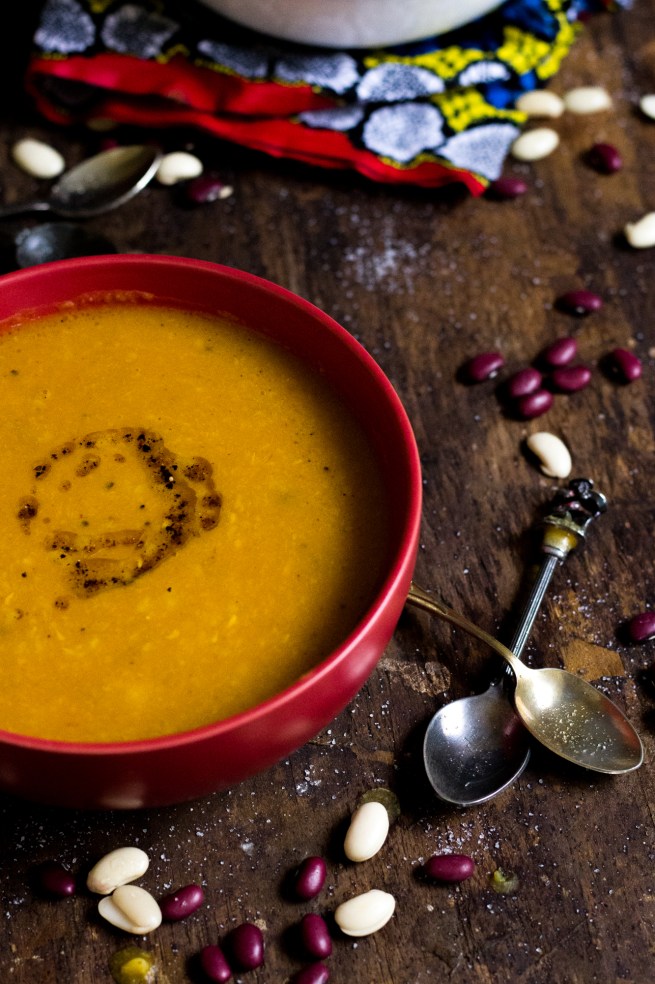
Firinda had never really been a common food in our home. And this is because it is a delicacy. It is until recently that we all fell in love with its loveliness. My grandmother told me of the history of this amazing soup. Firinda comes from the far western part of Uganda and was a special soup prepared only on weddings because of its laborious preparation. It requires soaking the beans till the skin is soft (preferably overnight) and then peeling them one by one. Now before you close this post altogether, just know that despite the hard work that comes with making this soup, you will not be disappointed later on. I have discovered that the peeling process is the most tiresome but relaxing as well (if that makes sense at all!) After the peeling, everything else is relatively easy.

Here is a short video on peeling:

What you will need:

2 C. Beans (pre-soaked and peeled)

3 Large tomatoes

1 Small onion

1/2 C Spring onions(chopped)

1 Clove of garlic

1/2 Tsp. Ground ginger powder

Salt

Cooking oil

Curry Powder

Black pepper

 Method

In a pot, combine the peeled beans with water and let them boil over medium heat for thirty minutes. While the beans are boiling, chop the tomatoes, onions, and garlic. Set aside. After the beans have boiled for thirty minutes, Remove from fire. In another pot, pour cooking oil and after one minute, add the salt, ginger and garlic. Keep stirring to keep from burning. Add onions and tomatoes. stir for three more minutes. Add the beans(with the water used for boiling them) and cover. Let them cook for another 20-30 minutes stirring occasionally till the beans are flaky(read: slightly disintegrating and tender). Remove from fire. Using either a wooden ladle, a pestle or potato masher(or anything that can mash really), mash the soup until it has a creamy consistency. Add the black pepper and sprinkle the chopped spring onions in the soup and serve.

Firinda - A Kitchen in Uganda-11

The great thing about this firinda is that it is basically a clean canvas to work with. You can totally flavor it the way you desire. As much as peeling the beans is the most annoying part of preparing this soup, it is also what makes it unique. The best way to have fun with this is to call friends over so that you can have real conversations while at it or you could just watch a movie. But if you still think it is too much of a job, you could have a peeling party of about five Kilograms of beans (just kidding…less than that of course) so that you can store the rest in the refrigerator because you will want to eat it again. I personally find this method effective.

So, are you ready to try it now? Let me know how everything turns out in the comments below

🙂

Sophie


Pan-Fried Cookies

Hi there! The other day my little sis had a project to do and the requirement was to make cookies. I was excited because it was an excuse to bake (yey!). So we set out to make sugar cookies. The day came to finally bake the cookies and halfway through the process, a blackout happened (…or rather electricity went since it was daytime). We were frustrated because this is a common phenomenon and when doing anything that involves the use of electricity, one has to simply pray and hope… The situation was completely hopeless since we had made the dough already (we even thought of freezing it and then we realized a refrigerator too uses electricity)! Then out of the blue my sis was like “let’s just fry them” and I told her that is the worst idea ever. I mean seriously who fries their cookies? (!?!) Guess we did (ha!). I have to say this is one of those ideas you don’t think will work out but then in the end you realize its way better that you hopped!

What you will need:

2 ½ C all-purpose flour

½ Tsp. baking powder

1 C butter/margarine (melted)

¾ C sugar

1 Large egg

1 Tsp. Vanilla extract

¼ C.Milk/Water

Method

In a large bowl, mix all ingredients together starting with the dry ingredients (flour, baking powder, sugar).

Next, add the wet ingredients (butter, egg and vanilla extract and milk). Keep mixing till the mixture is coarse but well blended and has formed a firm dough.

Next, shape the dough into cookies of your desired size and place them in a large non-stick pan.

Set the pan on low fire (really low) to prevent them from burning and cover.

Let them cook for five minutes. Using a spatula, flip them and let the other side cook for another five minutes.

Make sure they don’t burn. Remove from pan and let them cool down.

So there you have it. A pan-fried cookie. The taste is amazing (duh!) and it is super crunchy. I used to feel sad when I realized I couldn’t try out all these amazing recipes because I lack an oven but slowly by slowly I am discovering hacks that make it fun(ner) to be in the kitchen. Guess that is the joy of cooking. Now go cook some cookies (no pun intended)… hmm now that I am thinking about it, maybe that is why they are called cookies in the first place. Maybe they are meant to be cooked people! Ha!

🙂

Sophie

PS:BTW the second batch burnt because I was busy doing other things. Shame!